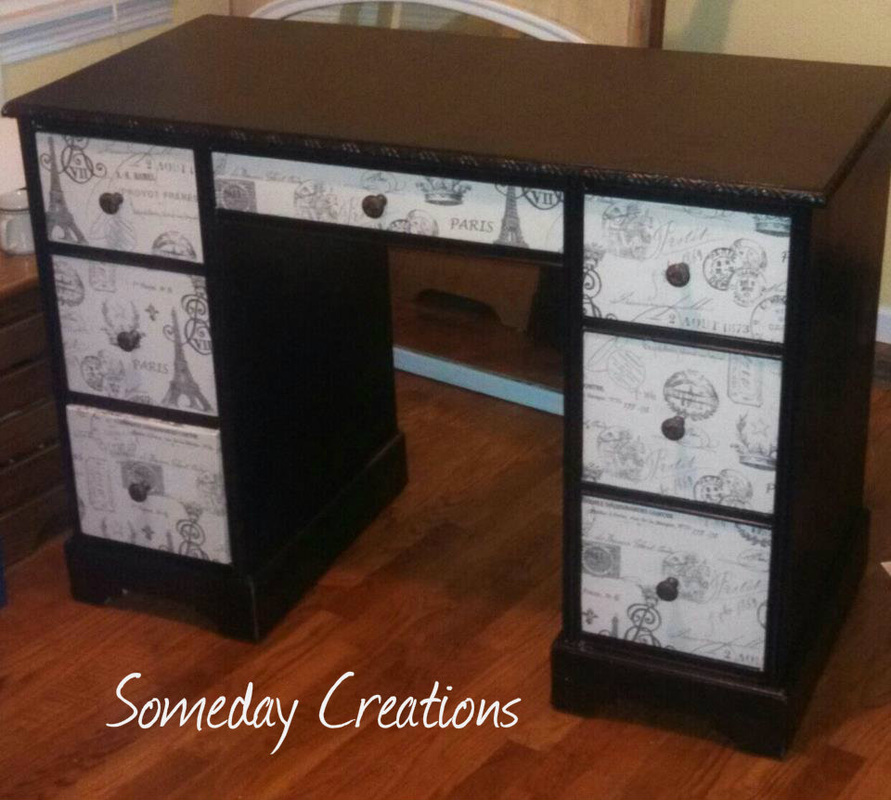
Wouldn't it be amazing if we could see the history of a piece of furniture when it comes into our possession? A few months ago I traded Kristen a red corner cabinet for a white vanity. But the vanity wasn't always white. Kristen had saved it from a used furniture store where it sat covered in bright pink and green paint. She worked her magic and turned it into an elegant white beauty. When the vanity came into my possession I had an idea I had been dying to try on something.
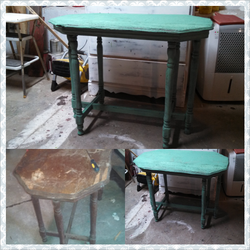
So I;m sure you are asking where the before pics are right?? My WORST habit is not taking pics before I get started on a project. I get soo excited and before I know it I;ve got the item all torn apart and stripped down! However I do have a few pics I took through out the make over to share with you.
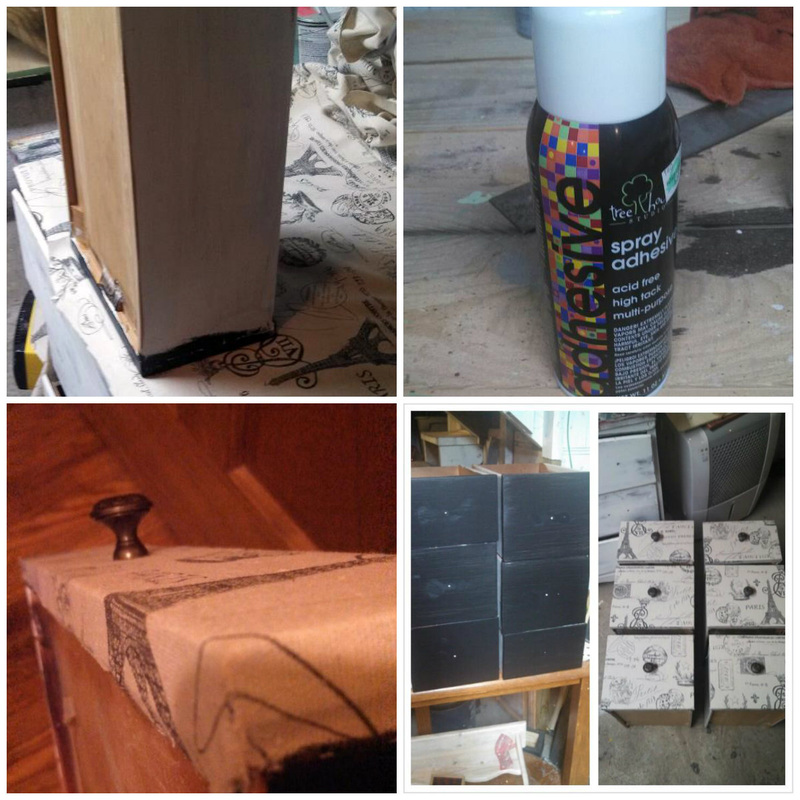
I had seen several pieces of furniture being made over with fabric on drawers. After trying unsuccessfully to fill in the old knob holes on the drawers I decided the vanity was the perfect project for trying out fabric covering. With a few yards of fabric and can of spray adhesive the make over began. You can also use mod-podge but I found the spray adhesive much easier to work with. Once you spray it on you have a decent amount of time to adjust the alignment of your fabric.
At first I tried to measure the drawer and cut the fabric to fit just the front. But since I didn't have nice fabric scissors the edges looked really awful. Instead I decided to cut the fabric larger than the drawer and wrap it around the edges. This gave the front of the drawers a nice clean look. After a couple drawers I realized the easiest thing to do would be to set the drawer face on the fabric and cut around it. It was easier to get the right size AND I could see what part of the pattern would be on the drawer. It was really as simple as spraying the drawer face, laying the fabric on top and smoothing out the wrinkles.
When it came time to finish off the corners I cut a little slit in each one and folded them down like you would when wrapping a gift. The fabric on the corners was a little thready and rough from cutting so I used mod-podge on the corners to smooth them down and give them a little protection to prevent the wear and tear of opening and closing the drawers.
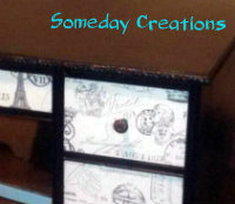
From a terrible pink and green mess, to an elegant white beauty, and now a Shabby Chic Paris Vanity this project has proved that there is always life left hiding somewhere in old furniture pieces. The Shabby Chic Paris Vanity sold from my booth in Pickers Outlet Mall in Southern Illinois and now resides in a home in the St.Louis Mo area.
At first I tried to measure the drawer and cut the fabric to fit just the front. But since I didn't have nice fabric scissors the edges looked really awful. Instead I decided to cut the fabric larger than the drawer and wrap it around the edges. This gave the front of the drawers a nice clean look. After a couple drawers I realized the easiest thing to do would be to set the drawer face on the fabric and cut around it. It was easier to get the right size AND I could see what part of the pattern would be on the drawer. It was really as simple as spraying the drawer face, laying the fabric on top and smoothing out the wrinkles.
When it came time to finish off the corners I cut a little slit in each one and folded them down like you would when wrapping a gift. The fabric on the corners was a little thready and rough from cutting so I used mod-podge on the corners to smooth them down and give them a little protection to prevent the wear and tear of opening and closing the drawers.
From a terrible pink and green mess, to an elegant white beauty, and now a Shabby Chic Paris Vanity this project has proved that there is always life left hiding somewhere in old furniture pieces. The Shabby Chic Paris Vanity sold from my booth in Pickers Outlet Mall in Southern Illinois and now resides in a home in the St.Louis Mo area.

 RSS Feed